


Every database team eventually runs into the same problem: your best test data is your real data, but using it outside of production is a compliance nightmare waiting to happen. Regulations like GDPR, HIPAA, and PCI-DSS don't care that you were "just testing"; if a developer's laptop or a staging server leaks real customer names, emails, or payment details, that's a breach. Navicat 18 tackles this head-on with Data Masking, a new feature built to transform sensitive production records into safe, realistic mock data so your development, testing, and QA teams can keep working without the risk.
Why Masking Beats Deleting or Faking Data
Stripping sensitive columns entirely or replacing them with obviously fake placeholders (test1, test2, xxxxx) often breaks the very workflows you're trying to test, since queries that depend on realistic formats, uniqueness constraints, or referential integrity can behave differently against garbage data. Masking solves this by preserving the shape and usability of your data while removing anything that could identify a real person.
Navicat 18 supports five industry-standard masking techniques:
- Substitution: swaps real values for realistic but fictitious ones (e.g., a real name replaced with a different, plausible name)
- Variance: shifts numeric or date values by a random offset, keeping trends intact without exposing exact figures
- Shuffling: randomly reorders values within a column, so the data is real but no longer tied to the correct row
- Hashing: converts values into a fixed, irreversible string, useful when you need consistency (the same input always hashes the same way) without any resemblance to the original
- Nulling: simply blanks out a field entirely, best for data that has no use case at all outside production
Which technique you reach for depends on what the downstream test actually needs; Hashing is great for values you need to join or match on, while Substitution keeps things readable for QA staff eyeballing the data.
Masking Data in Navicat 18: A Quick Walkthrough
The Data Masking feature is available in Enterprise and Standard Editions and works with MySQL, Oracle, PostgreSQL, SQLite, SQL Server, MariaDB, MongoDB and Snowflake databases. Here's how to turn several columns of real customer data into safe, realistic mock data:
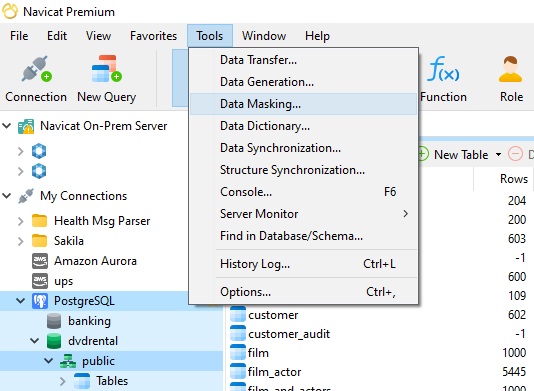
- In the main window, select Tools -> Data Masking from the toolbar.
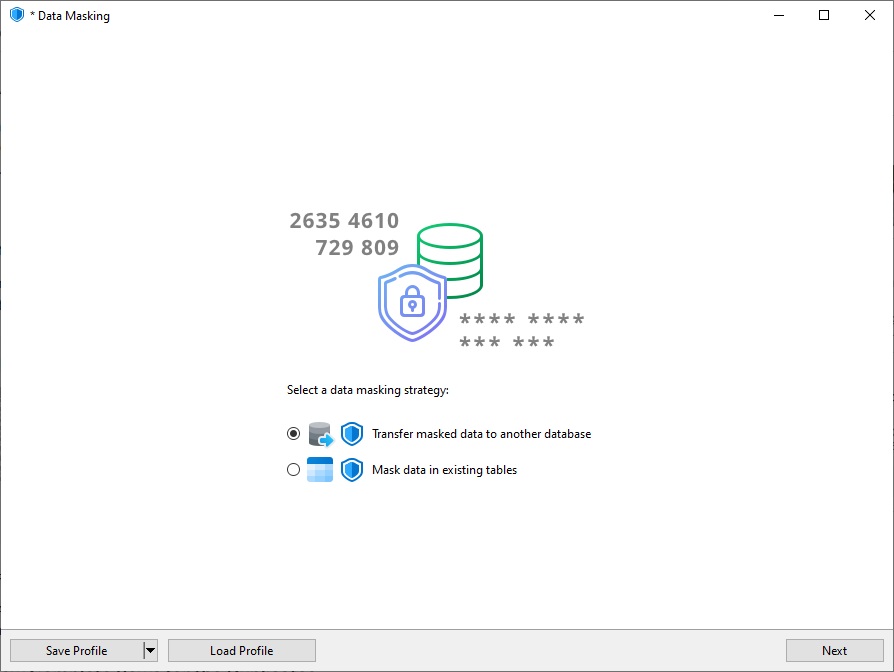
- That will launch the Data Masking wizard, which will guide us through the process.
On the first screen, we can apply masking to our workflow by transferring masked data to another database (default) or apply the masking to existing tables. We'll accept the default.
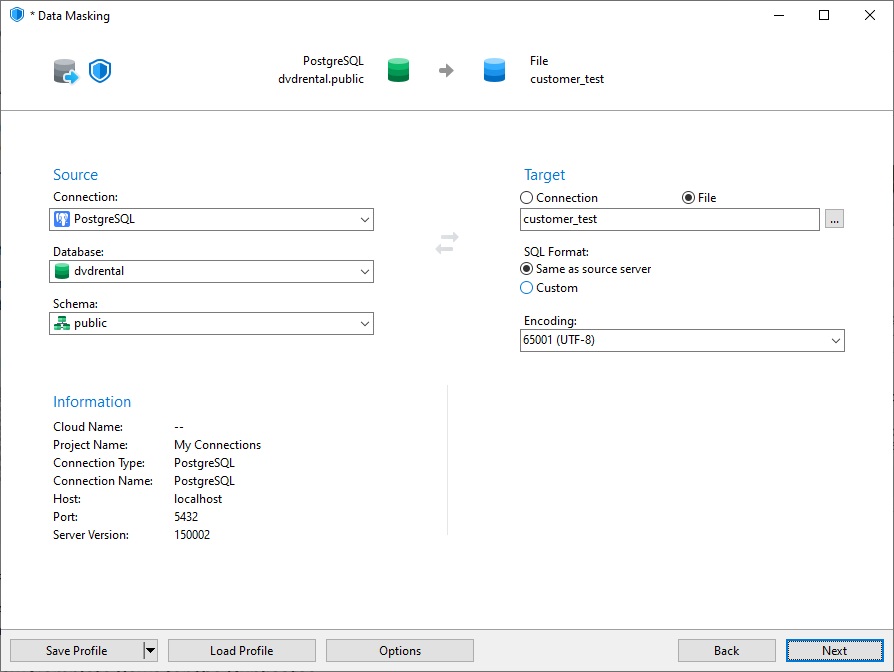
- Next it's time to select the source and target databases. Since we opted to transfer the masked data to another database on the last screen, we have the option of choosing a database or to output the SQL to a file. Let's do the latter and call our file "customer_test". It's a great choice if we want to use the same test data across several databases.
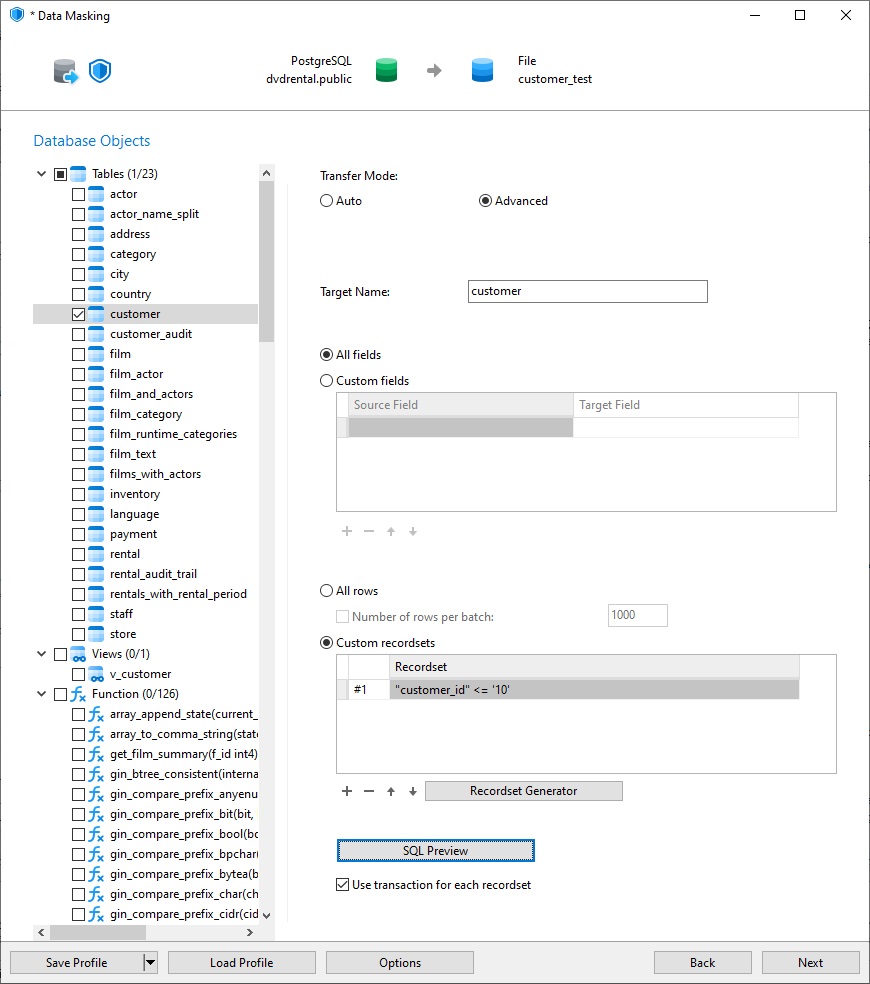
- The next screen is where we can select which tables and rows we want to mask. We'll choose the customer table. (Note that, for all databases except MongoDB, performing Data Masking requires the table to have a primary key.) There are two main Transfer Modes: "Auto" and "Advanced" available: "Auto" masks all rows and keeps the field names intact, while selecting the "Advanced" option gives use total control over the target table name, field names, as well as which rows to process. We'll keep everything the same, except for the recordset. Here, we'll limit the records to the first ten customer_ids. To do that:
- Select the "Custom recordsets" option. That sets the cursor on a new empty row in the Recordsets list.
- Clicking on the ellipsis [...] button on the right of the textbox opens the Filter dialog.
- There, click the + sign to open the Filter dialog. You'll probably recognize it as it works exactly the same way as the WHERE clause of the Visual Query Builder.
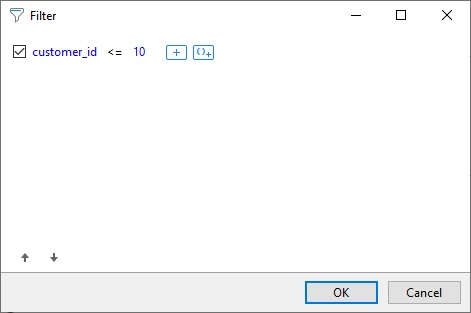
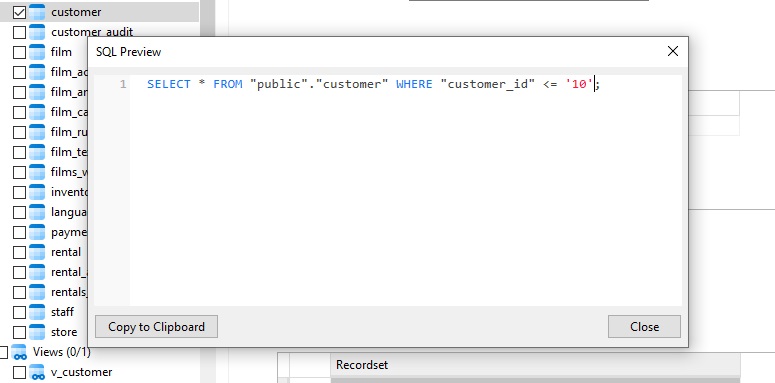
- We can view the generated SQL by clicking the SQL Preview button.
Here's the completed database Objects screen:
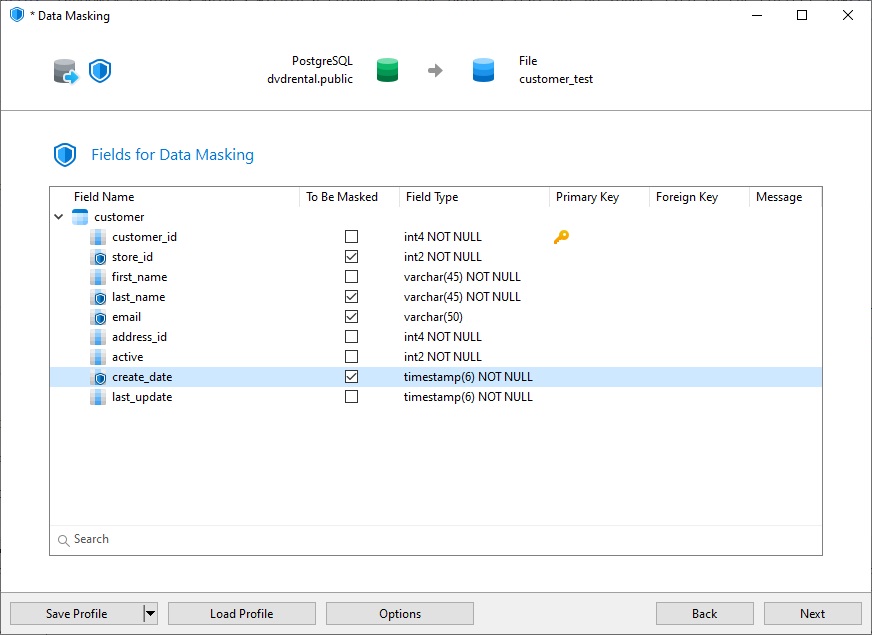
Now we'll select which fields to mask. Let's go with the store_id, last_name, email, and create_date.
- The next screen is where we'll tell Navicat exactly how to mask each field. Let's go through them one by one:
The store_id Column
Being a numeric field, the store_id gives us a lot of masking options. Let choose Shuffling for the Data Masking Technique. That will assign valid ids to each row, but in a different order.
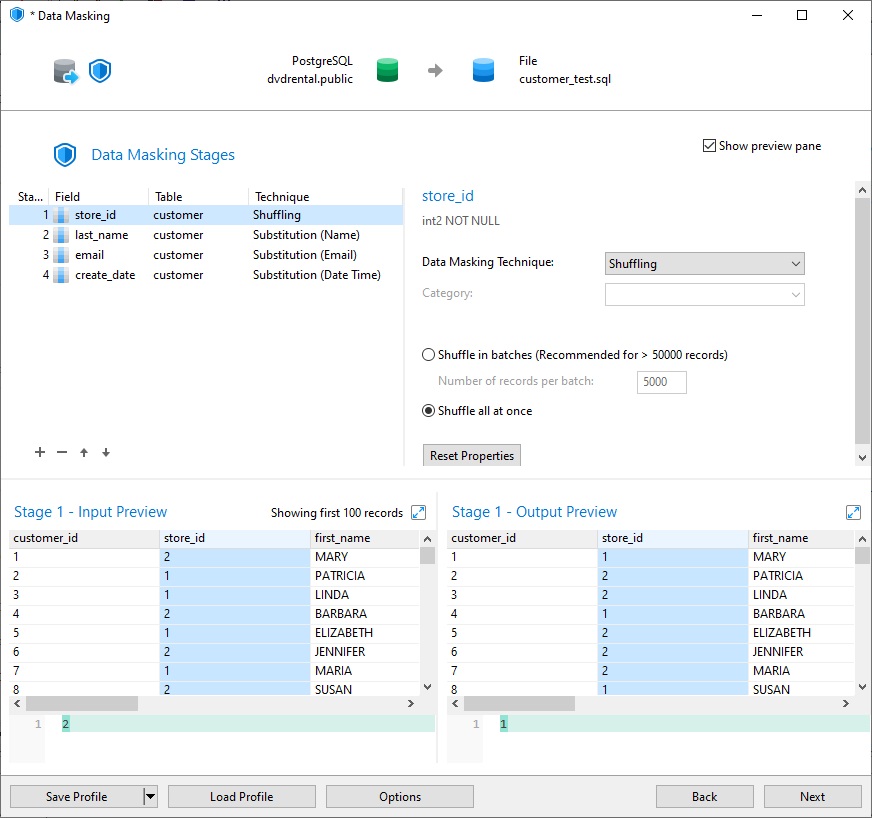
We can see the output at the bottom of the screen.
The last_name Column
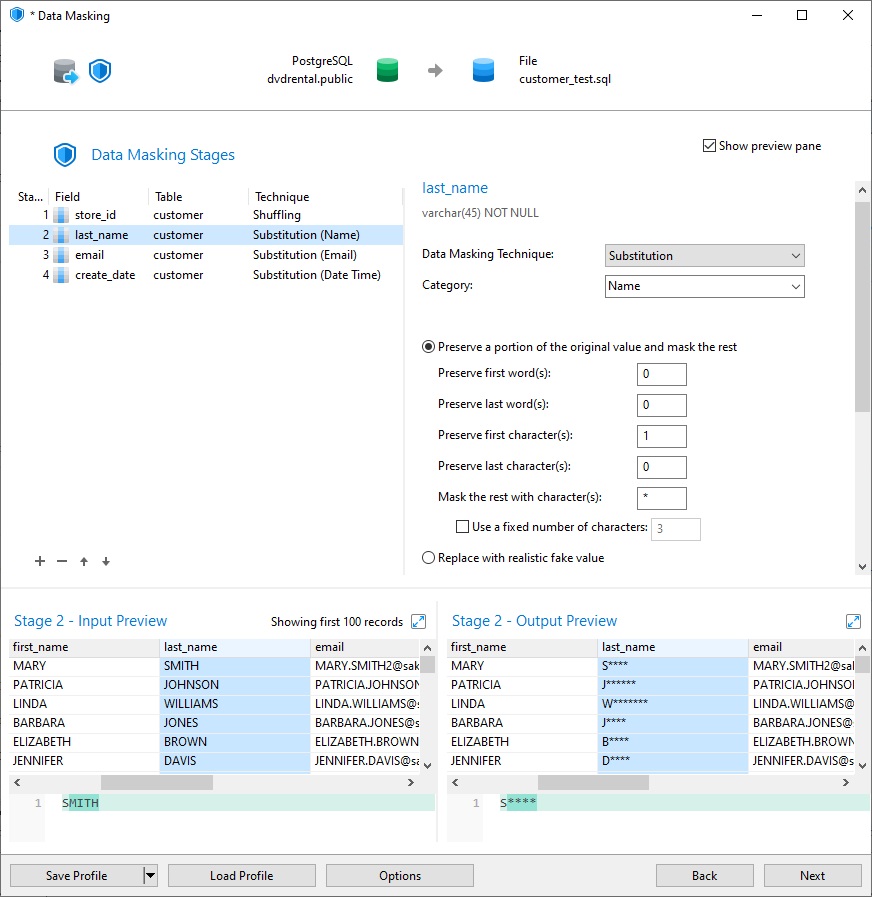
For the last_name field, we'll use Substitution for the Data Masking Technique. There are also a number of Categories to choose from, ranging from generic to more specialized. "Name" will work perfectly for our purposes.
We can also Preserve a portion of the original value and mask the rest or Replace with a fake value. We'll go with the first option so that every letter of the last names except the first letter will be masked by asterisks (*).
The email Column
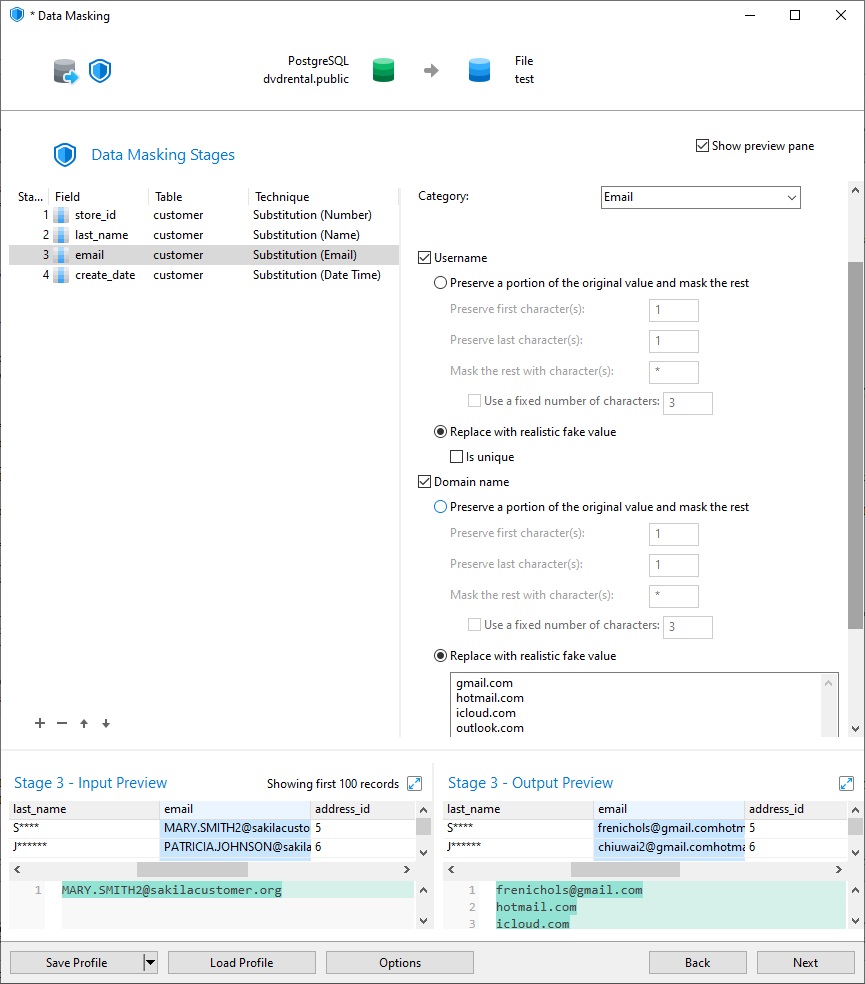
Emails have their own Category, allowing us to apply a different mask to the username and domain portions. In the case of the domain name, Navicat provides a customizable list of potential candidates.
The create_date Column
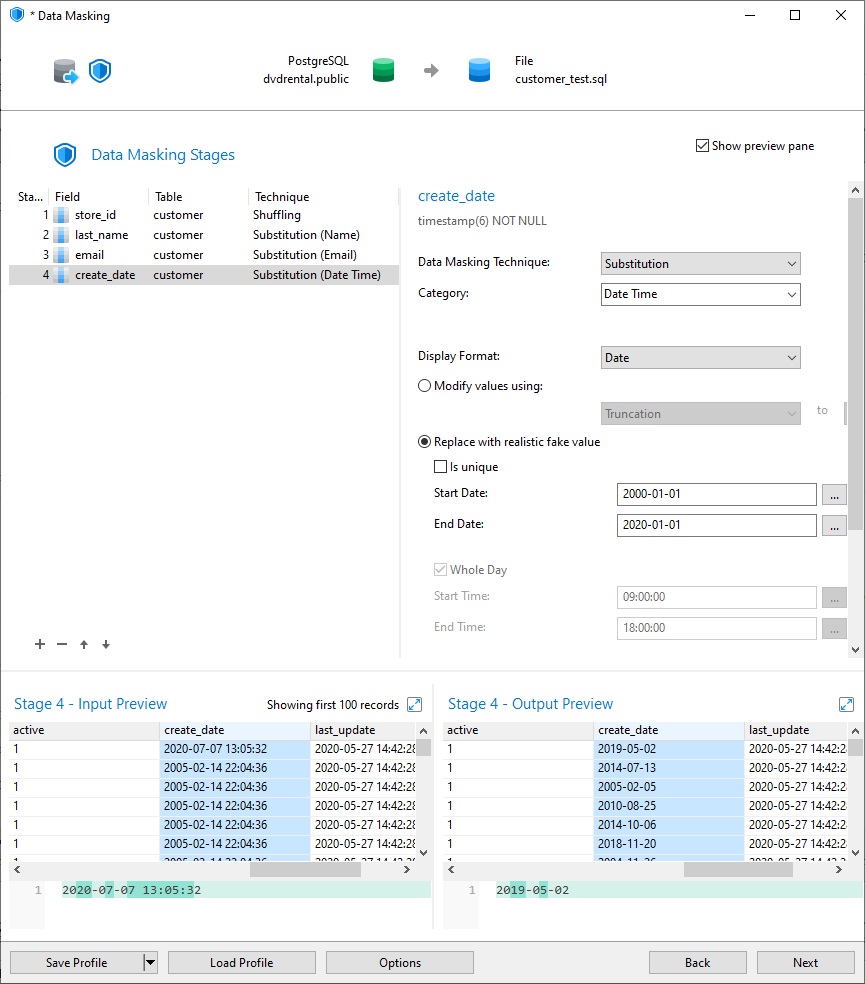
Dates and times provide many masking possibilities. For example, we can convert a DateTime to a Date, modify values or replace them with realistic fake substitutes.
- The Summary gives up one final opportunity to review the masking operations before starting the process.
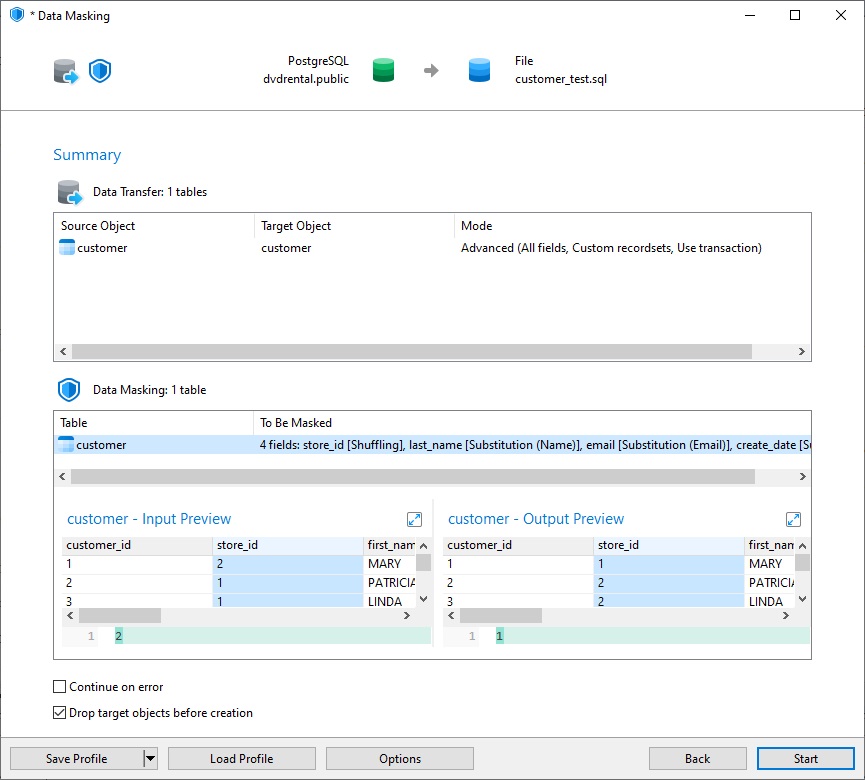
- Navicat will give us a full rundown of what actions it's performing.
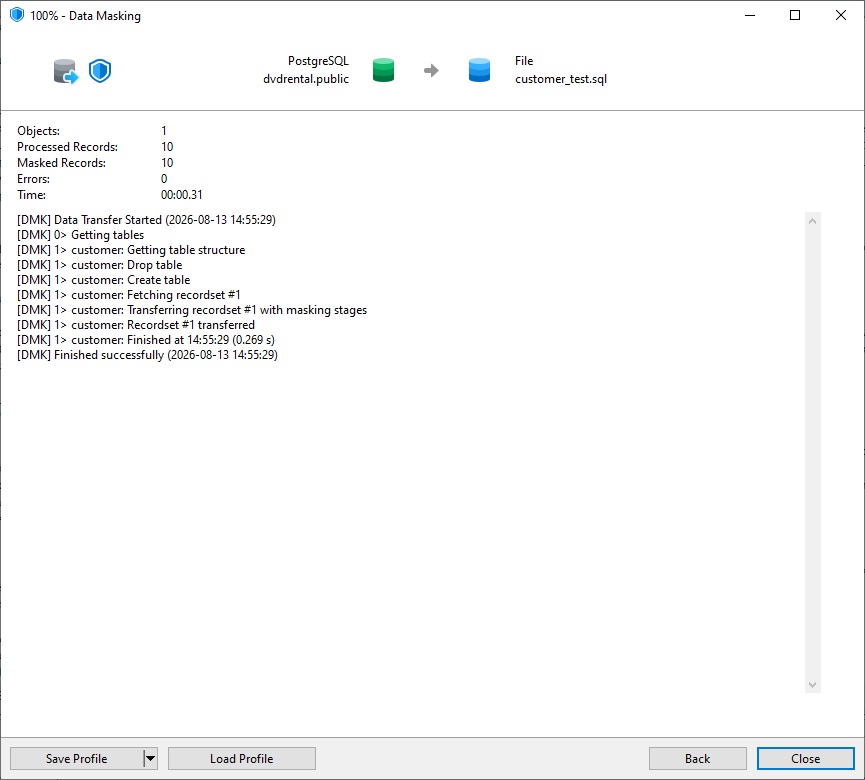
- After closing the dialog, we can view the output file in Navicat via the File -> Open File -> Query... command.
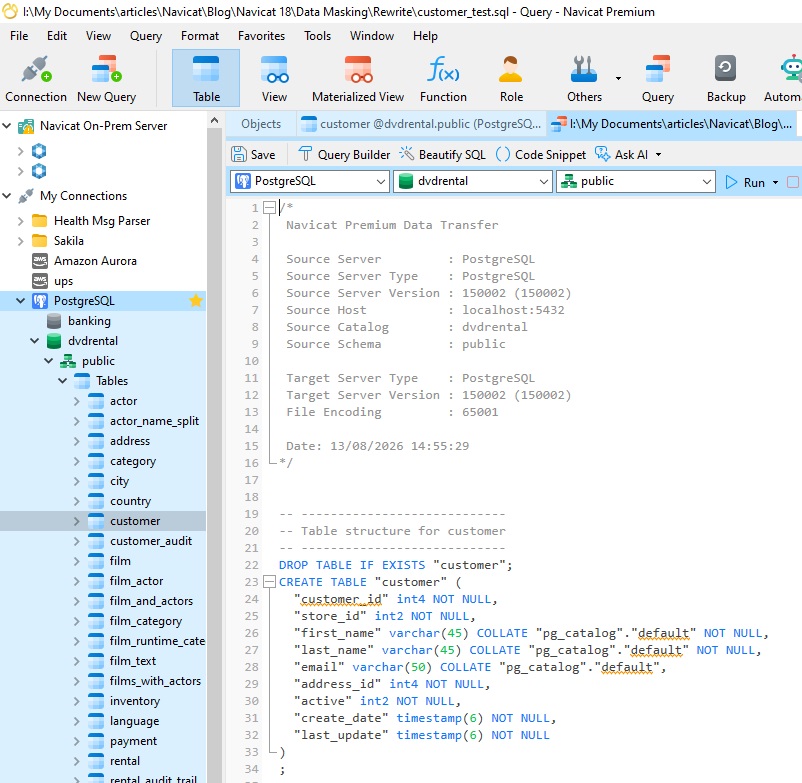
Because the whole process runs within Navicat, there's no need to export data to a separate tool or script - you can mask an entire database in minutes, right where you're already working.
Wrapping Up
Data Masking closes a real gap for teams juggling compliance requirements and the practical need for realistic test data. Combined with Navicat 18's broader AI toolset, it turns what used to be a manual, error-prone process into a few clicks. If your team handles regulated data in dev or test environments, this is one feature worth trying out as soon as you upgrade!