

Part 3: Configuring User Privileges
In this series, we've been exploring how to perform common user administration tasks using Navicat's flagship product, Navicat Premium. In Part 1, we learned how to secure the MySQL root account using the Navicat Premium User Management Tool. Part 2 focussed on setting a new user's account details, account limits, and SSL settings. In today's blog, we'll move on to the remaining tabs of the New User Object tab: namely, Server Privileges, Privileges, and SQL Preview.
Server Privileges
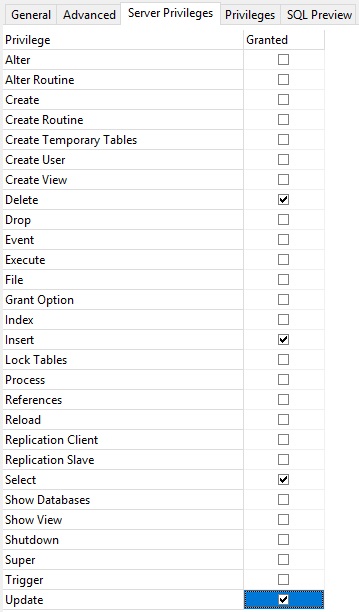
This tab contains a list of privileges that apply to the server connection as a whole. To assign a privilege, simply check the option against the server privilege listed. For example, the following configuration assigns Select, Update, Insert, and Delete privileges to our new bob_s@localhost user for the entire server:
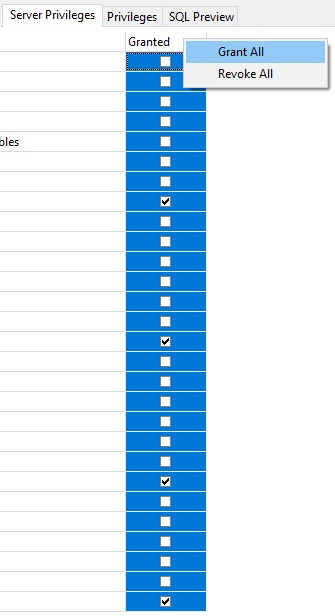
Rather than select individual checkboxes, you can also grant and revoke all listed privileges at once by right-clicking anywhere on the Server Privileges tab and choosing the appropriate option from the context menu:
Privileges
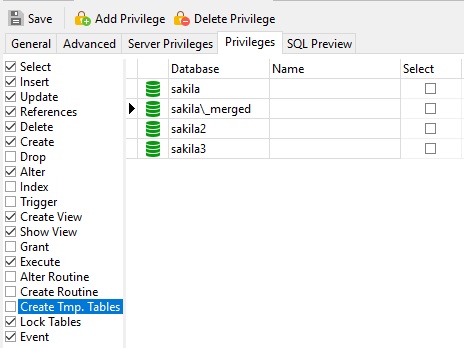
Want to assign privileges for a specific database? The Privileges tab is the place to do that. I shows each registered database for a connection, along with a list of privileges, listed in each row. Here's the Privileges tab assigning Create, Drop, and Alter privileges to our user on the Sakila database:

Now our new bob_s@localhost user has Create, Drop, and Alter privileges on the Sakila database, in addition to Select, Update, Insert, and Delete privileges for the entire server.
Showing/Hiding Columns
Due the large number of privileges, you'll likely have to scroll horizontally to see some of them. However, if you are not interested in some privileges, you can hide them by right-clicking anywhere within the tab and choosing Show/Hide Columns from the context menu. That will display a list of column names that you may show or hide by checking or unchecking the associated checkbox. This configuration removes several admin-related privileges from the table:
Note that columns are added and removed after the Save operation.
Viewing SQL Statements
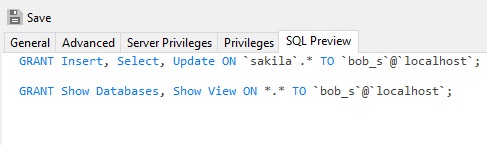
You can preview the SQL statements generated by Navicat before committing your changes on the SQL Preview tab. Statements are read-only and should only be used to verify your changes:
Upon saving your changes, the SQL Preview tab contents are cleared so that the same statements are not executed again.
User Information
After adding our new user, the User tab name will be updated from "Untitled (MYSQL) - User" to "bob_s@localhost (MYSQL) - User" where "MYSQL" is the connection name. If the Information Pane is visible, you'll see a short synopsis of the user's rights, including the SSL Type, Max queries per hour, Max updates per hour, Max connections per hour, and Max user connections, as well as whether or not they are a Superuser:
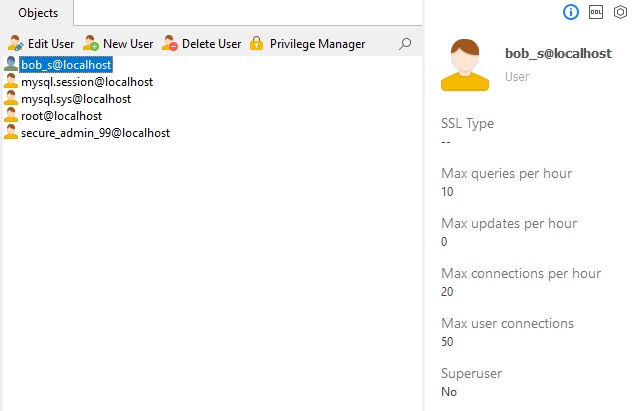
Note that you may have to refresh the tab to see the latest stats.
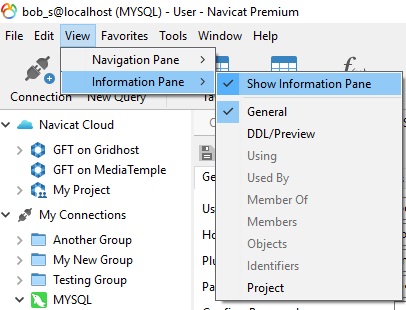
You can display the Information Pane via View > Information Pane > View Information Pane from the main menu:
Going Forward
In Part 4, we'll learn how to manage privileges from one place using the Privilege Manager tool.


