

Many database management and development tools support multiple connections to homogeneous databases, i.e., where they are all of the same type, ALL MySQL, ALL SQL Server, ALL Oracle, etc. On the other hand, very few support heterogeneous database servers, i.e. MySQL AND SQL Server AND Oracle, etc. Don't believe me? Just google it!
One of the few tools which does support heterogeneous database products is Navicat Premium. Moreover, it can connect simultaneously to MySQL, MariaDB, MongoDB, SQL Server, Oracle, PostgreSQL, and SQLite databases from a single application. It is also compatible with most cloud databases, including Amazon RDS, Amazon Aurora, Amazon Redshift, Microsoft Azure, Oracle Cloud, Google Cloud, Alibaba Cloud, Tencent Cloud, MongoDB Atlas and Huawei Cloud.
In today's tip, we'll learn how to set up multiple connections in Navicat Premium - one to a local MySQL instance and another to Microsoft Azure.
Connecting to a Local Database Instance
Navicat Premium supports a wide array of connection types for both local instances and cloud services. Moreover, connections may be established over secure protocols such as SSL and SSH. The latter, Secure Tunneling Protocol (SSH), is a good option in situations where your Internet Service Provider (ISP) does not provide direct access to its server; HTTP is another good choice.
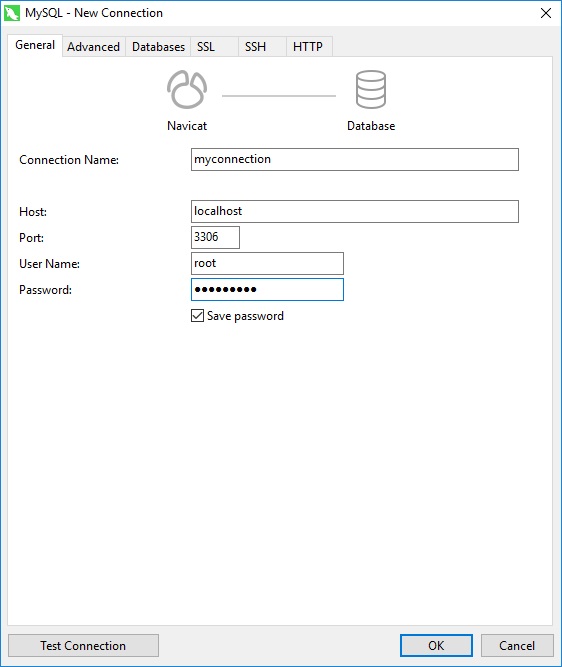
Here are the steps for connecting to a local MySQL instance:
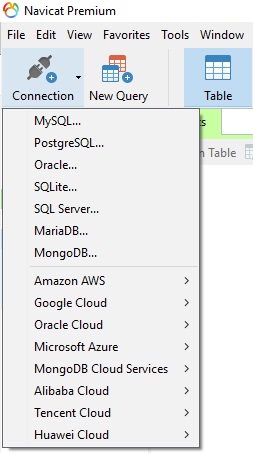
- Click Connection and select your server type. Then, enter the necessary information in the Connection dialog:
Note that Navicat authorizes you to make connection to remote servers running on different platforms (i.e. Windows, macOS, Linux and UNIX), and supports PAM and GSSAPI authentication.
Later, you can edit the connection properties by right-clicking the connection and selecting Edit Connection. - You can test your connection properties by clicking the Test Connection button.
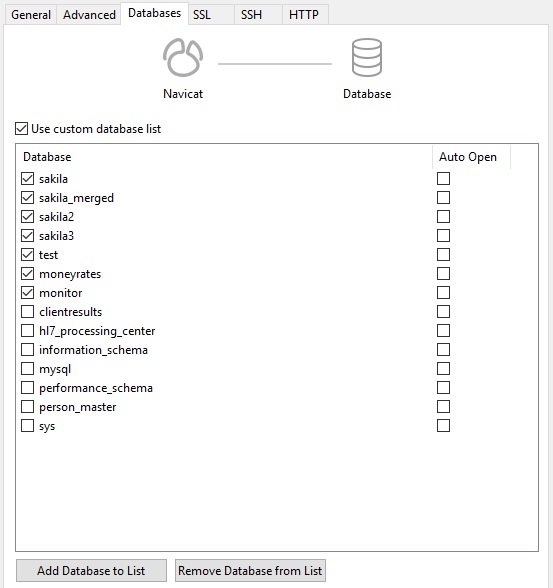
- If you'd like to customize your database list, you may do so on the Databases tab:
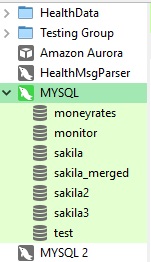
- After closing the New Connection dialog, your new connection will appear in the Navigation Pane, on the left:
Connecting to a Cloud Service
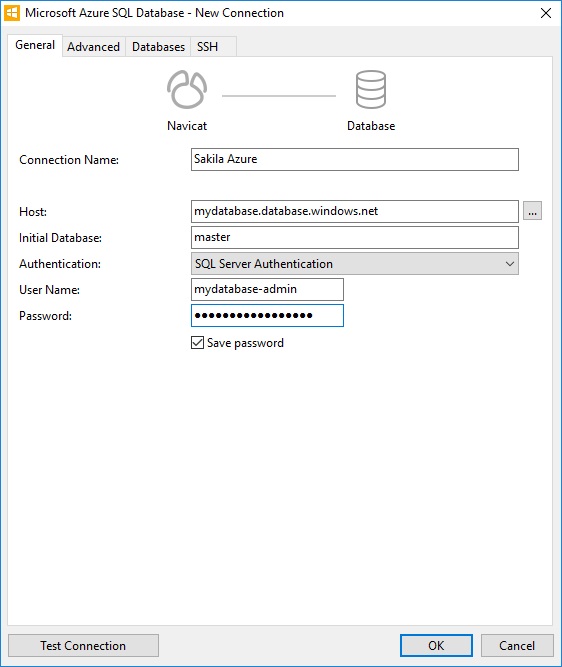
The procedure for connecting to a cloud service is similar. Let's connect to Microsoft Azure SQL Database instance.
- Select Connection -> Microsoft Azure -> Microsoft Azure SQL Database... from the main menu.
- Once again, enter the necessary information in the General tab of the Connection dialog:
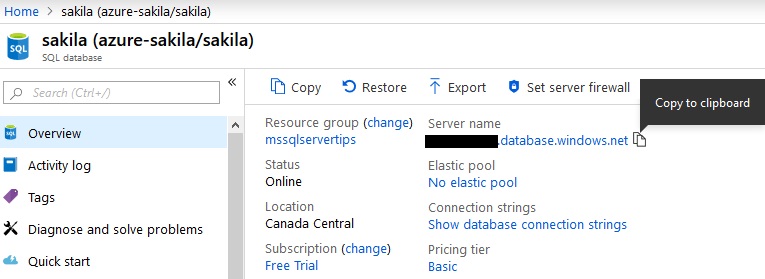
You'll find the Host value under the Server name header on the Overview page of your Azure instance. There's even a button to copy the name to the clipboard!
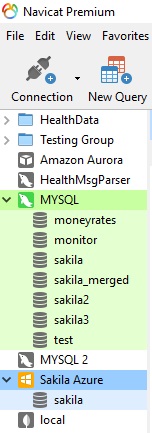
- After closing the New Connection dialog, your new connection will appear in the Navigation Pane. You can open your connections by double-clicking them (I color-coded these to highlight them):
Conclusion
In today's tip we learned how to set up multiple connections in Navicat Premium. Being able to connect to multiple database instances simultaneously offers many benefits, from being able to query multiple instances using the same SELECT statement, to easier migration. In fact, we explored How to Query across Multiple Databases in the previous tip. Interested in trying out Navicat Premium? You can evaluate it for 14 days completely free of charge!


