

MongoDB employs a serialization format called "BSON" to store documents. A combination of the words "Binary" and "JSON" (JavaScript Object Notation), you can think of BSON as a binary representation of JSON documents. Unfortunately, the BSON serialization format has a size limitation of 16 MB. While that leaves plenty of headroom for most data types, for some large binary formats, MongoDB employs a separate specification called GridFS for storing and retrieving files.
In today's blog, we'll be taking a look at how Navicat for MongoDB implements the GridFS spec to store large files.
About GridFS
To get around the 16 MB limit, GridFS divides the file into parts, or chunks, and stores each chunk as a separate document. By default, GridFS uses a default chunk size of only 255 KB. The file is divided into chunks of 255 KB, with the exception of the last chunk, which is whatever bytes are left. Likewise, files that are smaller than the chunk size have only a final chunk, using only as much space as needed plus a bit of additional metadata.
Behind the scenes, GridFS actually uses two collections to store files: one collection to store the file chunks, and the other to store file metadata.
GridFS is useful not only for storing files that exceed 16 MB but also for storing any file that you want access without having to load the entire file into memory.
Storing a Large File in Navicat for MongoDB
Navicat supports GridFS buckets and provides a tool for this very purpose. Clicking the large GridFS button on the main toolbar displays a new tab, which includes several commands for working with your files. If you haven't previously added any files, only the New Bucket button is enabled:
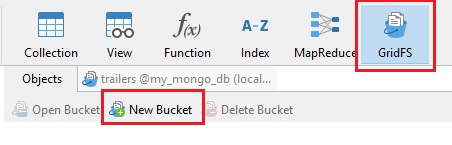
Suppose that you have a large video file that you'd like to include in your movie database. You'll need a bucket in which to add your file, so click the New Bucket button on the toolbar and enter a name for your bucket in the GridFS Bucket Name dialog.
You can add your file by clicking on Upload File:

It will bring up the File Browse dialog so that you can navigate to your file. Clicking the Upload button in the File Browse dialog commences the upload. The progress will be shown in a progress bar at the bottom of the screen:

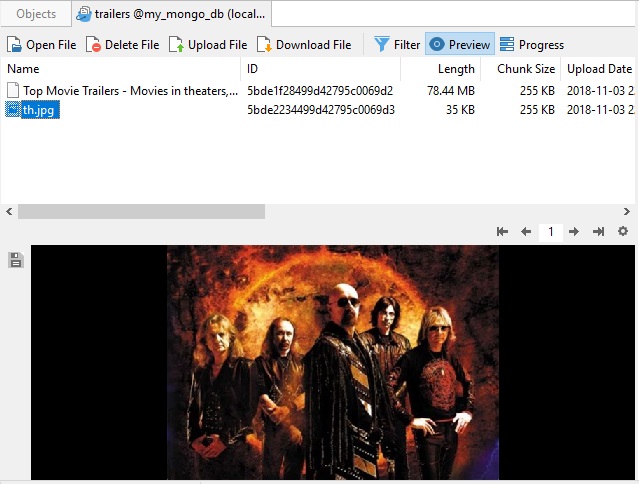
Once completed, you'll be able to view the file details:

The file details correspond to the GridFS files collection fields:
{"_id" : <ObjectId>,
"length" : <num>,
"chunkSize" : <num>,
"uploadDate" : <timestamp>,
"md5" : <hash>,
"filename" : <string>,
"contentType" : <string>,
"aliases" : <string array>,
"metadata" : <any>,
}
Navicat can work with much smaller files as well. It's particularly adept at working with images; it even has a preview feature so that you can view images without having to open them in another tool:
Retrieving Files
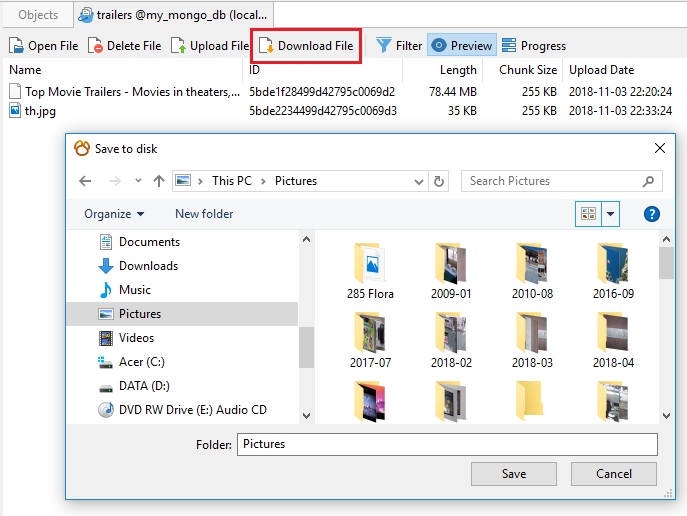
Once a file has been uploaded into your database, you don't have to keep a copy on the file system. Anytime you need it, just click the Download button and select the folder in which to save the file:
And that concludes our exploration of GridFS Buckets in Navicat for MongoDB!


