

In the last couple of blogs, we learned how each of Navicat for MongoDB's Collection views - Grid, Tree, and JSON - provide a different set of command buttons for performing operations that are tailored to that particular view. In the last blog, we learned about transactions, filtering, and sorting. In today's blog, we'll be covering how to expand array values, colorize cells, and migrating data between MongoDB and other databases.
Expanding and Collapsing Array Values
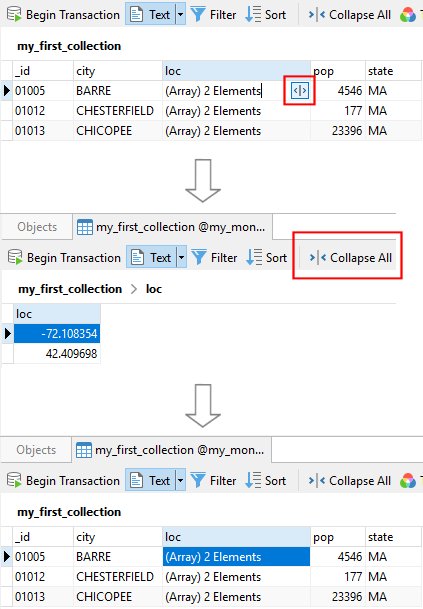
In Grid View, arrays are depicted as "(Array) [N] Elements". However, that does not mean that we cannot view their contents. Placing the cursor on a cell that contains an array causes the Expand - [<|>] - button to appear on the right-hand side of the cell. Clicking it then drills down into the array so that we may view its elements. This process would continue until the innermost array is displayed. We may then return to the top (i.e. collection) level by clicking on the [>|<] Collapse All button at any time:
Highlighting Cells based on Data Type
Only present on the Grid View Collection Tab toolbar, color highlighting makes a cell's data type easy to identify. The Type Color button on the toolbar (as well as the the Enable Coloring option checkbox on the Type Color pane) applies the colors specified on the Type Color pane to highlight cells based on their data types.
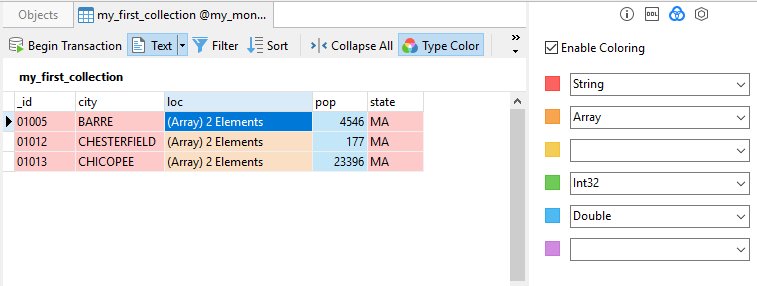
If the grid window is docked to the Navicat main window, you can click the Type Color icon in the Information pane to show the color mapping fields:
Importing and Exporting a Collection
In all View types, the Collection Tab toolbar contains Import and Export buttons. These buttons perform very much the same function as the Import and Export items in the File menu. We won't be going ever every step of the import and export process here, but there are a couple of points to be aware of:
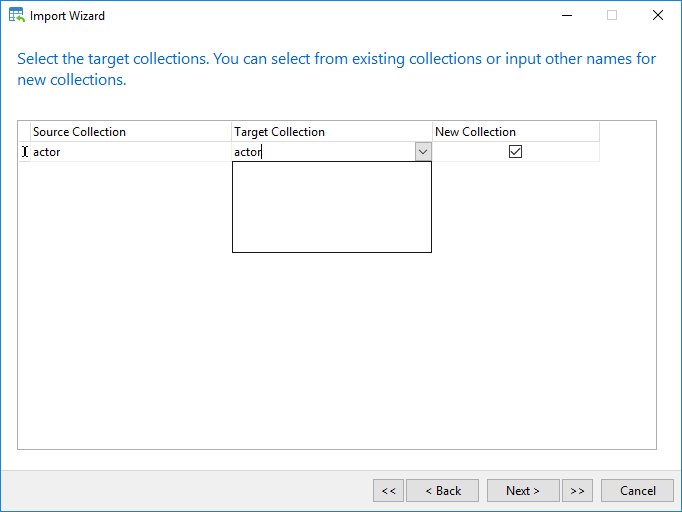
- On the screen that lets you set the target collection, you can either choose an existing collection or a new one. To create a new collection, just enter the collection name in the Target Collection field. That will automatically check the New Collection box:
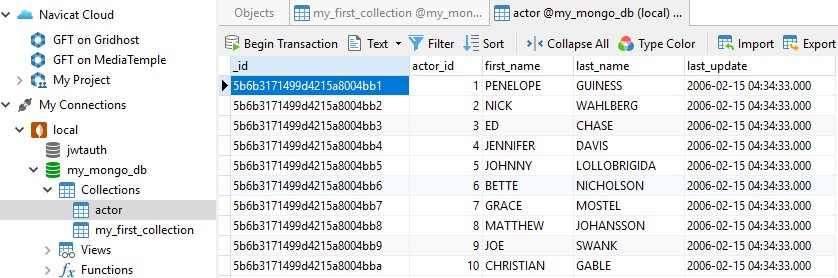
New collections will include the MongoDB _id field:
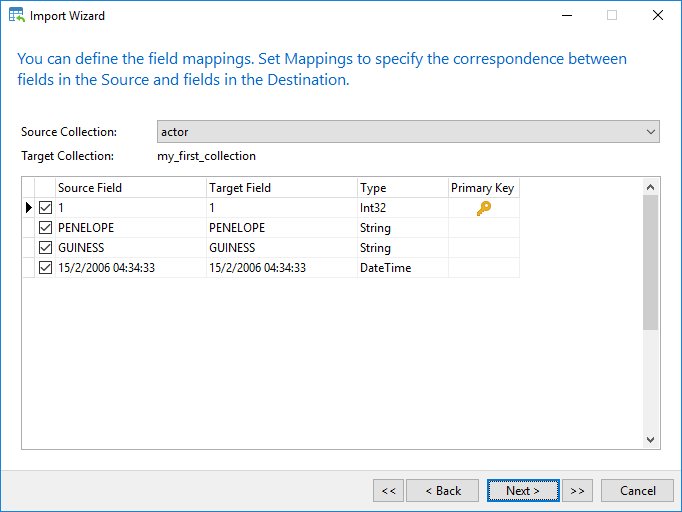
- On the Field Mappings screen, you can select which fields you want to import as well as their data type. It shows the Source and Target fields so that you may compare the effect on the data type on the latter. You may also designate which fields make up the primary key field:
With regards to the Export process:
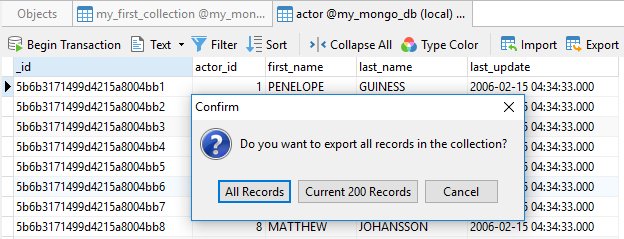
- When exporting large collections, a dialog lets you select whether to export the entire collection or only the currently displayed rows:
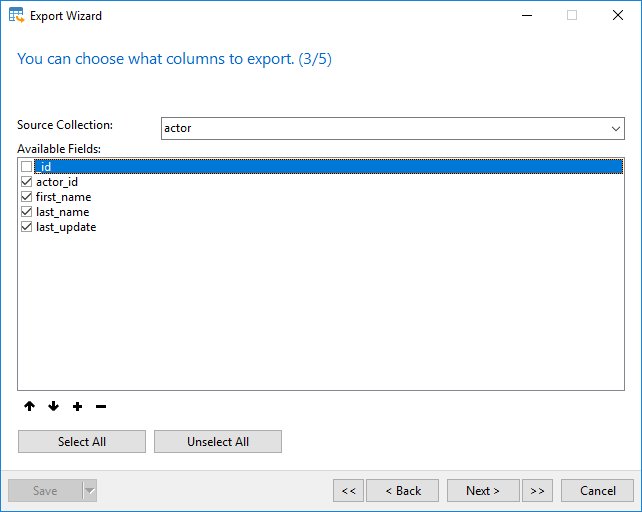
- On the third screen of the Export Wizard, you may want to remove the MongoDB _id field if you are planning on importing the data into another database type. Of course, if you are using a Navicat product to perform the import, it will allow you to ignore that field at that time:
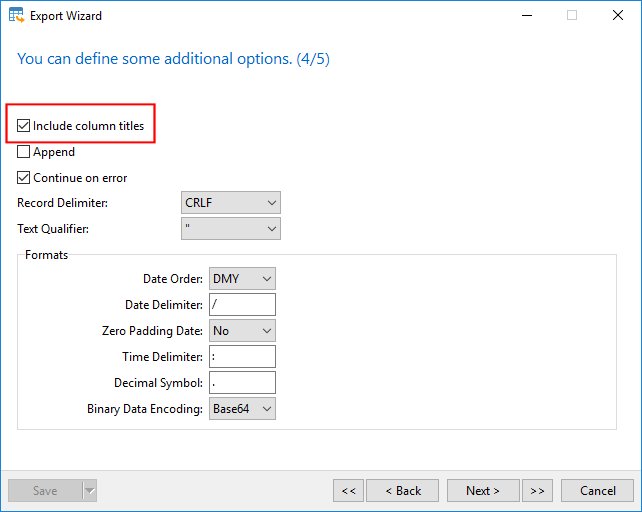
- The fourth screen of the Export Wizard lets you specify whether or not to include column titles as the first row of the exported data. It is recommended that you do check the "Include column titles" box because it tends to make importing the data easier:
In the next blog, we'll learn about the last button on the Grid View Collection Tab toolbar: the Analyze feature.


