

Tablespace Management
This 3rd and final part of the Navicat 16 and Tablespaces series will focus on how to manage tablespaces in MySQL using Navicat Premium 16. Recall that Part 1 presented some advantages offered by tablespaces, including Recoverability, Ease of Adding More Tables, Automatic Storage Management, and the Ability to Isolate Data in Buffer Pools for Improved Performance or Memory Utilization. The second installment provided more information on what tablespaces are, how they work and the types of default tablespaces you'll find in the various relational database products.
Creating a Tablespace
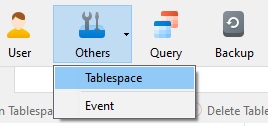
Just as Navicat provides Table and SQL Designers, there are also facilities for working with Tablespaces. To open the Tablespace Designer, click on Others -> Tablespace from the Main Toolbar:
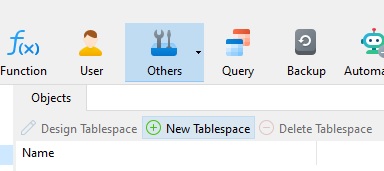
In the Designer, click on the New Tablespace button in the Toolbar:
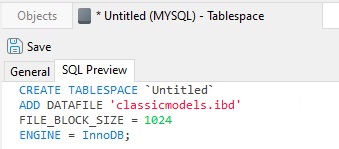
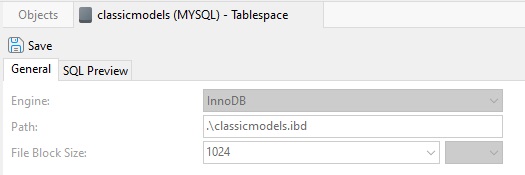
The fields shown in the Designer will depend on the type of database that your working with. In the case of MySQL, you'll see the following fields:
- Engine drop-down: For standard MySQL 5.7 releases, only the InnoDB engine supports tablespaces, so it's the only option in the drop-down. MySQL NDB Cluster 7.5 also supports tablespaces using the NDB storage engine.
- Path textbox: Specifies the path of the datafile/tempfile. Note that you have to include the ".ibd" file extension.
- Block Size drop-down: The block size for the tablespace. MySQL only supports a block size of 1024, or 1 MB, so be sure to select that option from the drop-down.
- Block Size Unit: The size of one data block. As mentioned above, MySQL only supports a block size of 1024, or 1 MB; for other database types, you may choose K, M, G, T, P or E to specify the size in kilobytes, megabytes, gigabytes, terabytes, petabytes, or exabytes.
You can see the generated SQL statement by clicking on the SQL Preview tab:
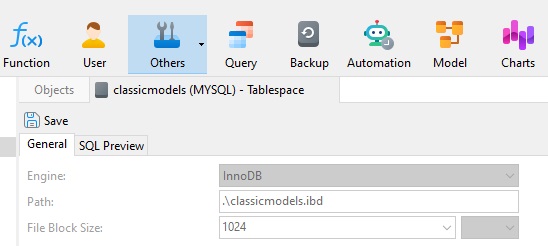
Navicat will issue the CREATE TABLESPACE statement upon clicking the Save button. Here are the New Tablespace form fields after a successful Save operation:
Before saving the tablespace, Navicat will present a dialog for entering the tablespace name that will be utilized to display the tablespace in the Tablespaces Objects list:
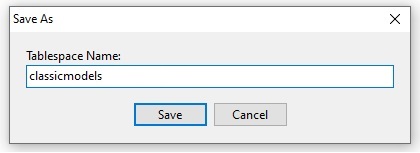
Hence, entering a name of "classicmodels" will add it as seen below:

Altering a Tablespace
Selecting a tablespace from the Tablespaces Objects list will enable the Design Tablespace button in the toolbar for editing. If the database in question does not allow tablespace editing, as in the case of MySQL, the form fields will be disabled:
Otherwise, data can be modified and re-saved.
Deleting a Tablespace
Selecting a tablespace from the Tablespaces Objects list also enables the Delete Tablespace button in the toolbar. Clicking it will bring up a confirmation dialog that requires the user to check a box indicating that the Delete action is permanent and cannot be undone:

The user may also click the Cancel button to close the dialog without deleting the tablespace.
Conclusion of Navicat 16 and Tablespaces Series
Tablespaces allow database administrators to better control the physical storage layout by putting some tables on faster or more redundant disks, or to stripe tables across disks. This series covered both the theoretical side as well as more practical matters of tablespace management, from their creation to deletion using Navicat Premium 16.


