

Navicat's latest On-Prem Server (3.1) is bringing AI assistance to database management in a big way. In fact, two of its three new features feature AI: there's a general purpose AI Assistant as well as a more specialized Ask AI tool aimed at SQL development. Both of these rely on APIs of popular AI models. In today's blog article, we'll learn how easy it is to get started with AI Assistants so that your team can benefit from the power of AI guidance.
A Brief Introduction to AI APIs
AI APIs (Application Programming Interfaces) are services that allow developers to access AI capabilities over the internet without having to build or host the underlying AI models themselves. Instead of training your own large language model - which requires enormous computing resources and expertise - you simply send a request to an AI API and receive an intelligent response back in seconds.
The use cases for AI APIs are remarkably broad, which is part of why they have become so popular. They power natural language processing tasks like answering questions, summarizing documents, translating languages, and analyzing sentiment. In software development, they enable code assistance features that can generate, explain, debug, and optimize code - exactly like Navicat's Ask AI tool does for SQL. Beyond development, AI APIs are widely used for content generation, data extraction, chatbots, virtual assistants, and image recognition.
This is why configuring the AI Assistant in Navicat involves selecting and connecting to an AI API provider, essentially giving the software its "brain." So let's move on to that now!
Adding an AI Assistant
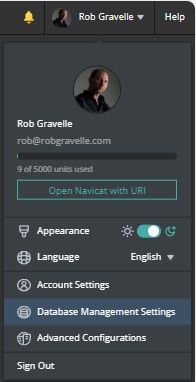
All of the details pertaining to AI Assistants are located on the Database Management Settings screen. It's available by clicking the drop-down that is associated with your Profile Name:
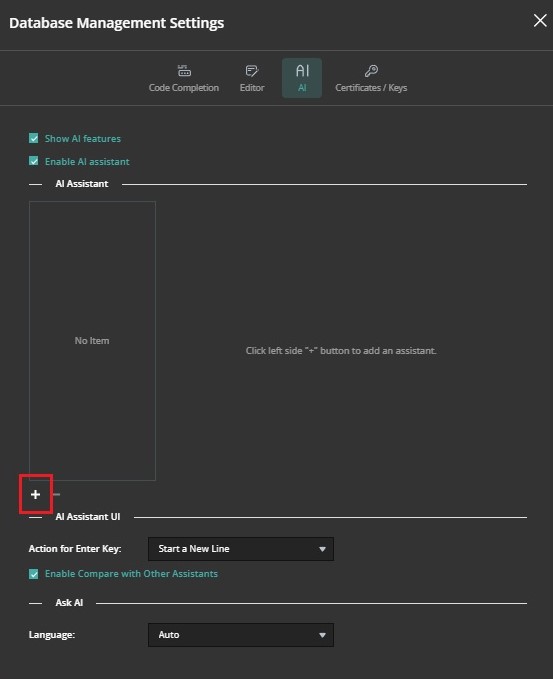
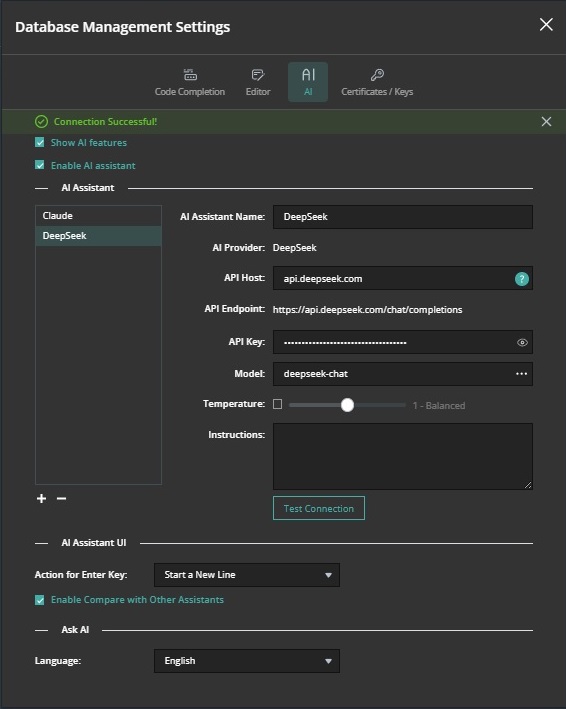
On the Database Management Settings screen, click the AI button at the top of the dialog to display all of the AI Assistant details. At first it will be mostly empty because we have not yet selected and AI Model. To do that, click the plus (+) icon at the bottom of the AI Assistant list:
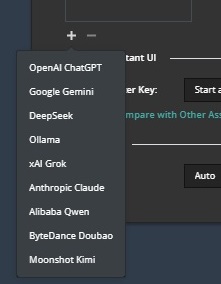
Doing so will open a menu containing all of the available AI model providers. All of the most popular providers are supported, including Anthropic Claude, Google Gemini, DeepSeek, Grok, and more.
Once you've selected an AI model provider, a number of fields will appear to the right of the AI Assistant list. These will vary depending on the provider you choose. For example, Claude supports a max_tokens parameter which we see on the screen as "Max Tokens". The right number for Max Tokens depends on what you're using Claude for, but here are some guidelines:
- Simple confirmations/classifications: 256-512 tokens
- Chat/Q&A: 1024-2048 tokens is usually plenty
- Code generation: 4096-8192 tokens for complex functions
- Writing/content creation: 4096-8192 tokens
Important things to know:
- max_tokens is the maximum Claude can generate - it will stop when it's finished, even if it hasn't reached the limit
- 1 token ≈ 4 characters or roughly 0.75 words in English, so 1024 tokens ≈ 750-800 words
- The maximum varies by model - Claude models support up to 8192 output tokens (though the total context window is much larger)
- You're only charged for tokens actually used, not the max you specify
If you want to limit the length of responses, start with 4096 tokens - this gives Claude plenty of room for detailed responses without being unnecessarily high. If you find responses are getting cut off, increase it. If you know you only need brief answers, you can lower it to save a bit on costs. Remember that setting it higher doesn't cost you more unless Claude actually uses those tokens, so it's often safe to be generous with this parameter.
Obtaining an API Key
Regardless of which AI provider you choose, the API Key is the most crucial piece of information that you'll need to provide. You'll need to obtain an API key from your chosen AI provider. An API key is essentially a unique, auto-generated password that identifies your application and grants it access to the AI service. When Navicat On-Prem Server sends a request to an AI API, it includes this key as part of the request, allowing the provider to verify your identity, track your usage, and apply the appropriate billing charges.
API keys are obtained by registering for an account on your chosen provider's platform—such as Anthropic's Console at console.anthropic.com or OpenAI's platform at platform.openai.com — and are typically generated instantly on demand. Since an API key provides direct access to a paid service, it should be treated like a password: stored securely, never shared publicly, and never embedded in publicly accessible code. Most providers allow you to generate multiple keys for different applications or team members, and to revoke them instantly if they are ever compromised.
Choosing a Model
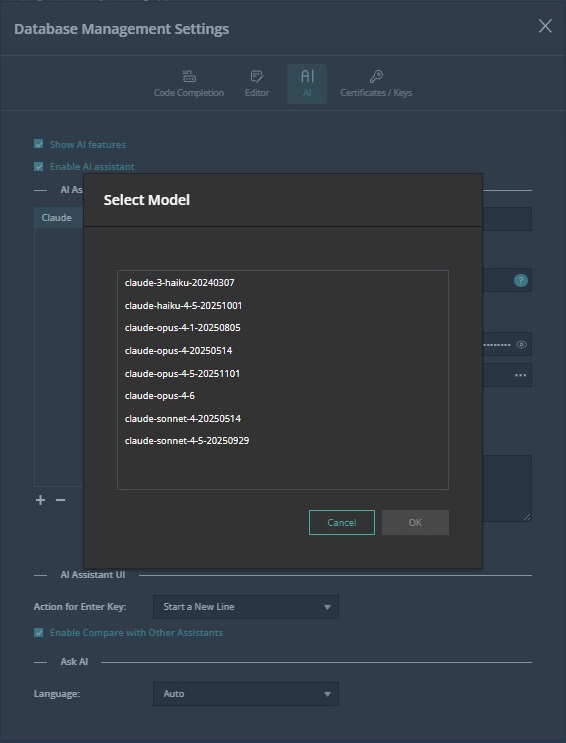
The most important decision you will need to make - next to the provider - is what model to use. Most AI providers offer several to choose from. Clicking the ellipsis (...) to the right of the Model textbox opens a dialog where you can select a model. Here are the choices for Claude:
It's worth noting that the cost for using different models can vary significantly. Consult the provider's model overview page for exact pricing information. For example, here is the overview page for Claude.
Putting It All Together
Once you've filled in all of the necessary information, you can test the API service by clicking the "Test Connection" button. If all goes well, you should see a "Connection Successful!" message at the top of the screen:
You're now ready to use both On-Prem Server 3.1's AI Assistant and Ask AI tools!


