As Web sites and Web-based applications become more important to commercial firms and other organizations, so too does the methods used for storing data online, such as customer contact information, system login details, product data, and much more. Rewritable flat files may be sufficient for extremely limited data for which security is not an issue. But for most Web sites and applications, a robust database is called for.
There are several relational database management systems (RDBMSs) from which you the developer can choose, ranging from expensive systems that can prove quite difficult to administer, to free and open source alternatives that may not have as many features as the proprietary RDBMSs, but can be much faster to set up and work with. Of these, MySQL is the hands-down favorite.
In this tutorial, we will take a detailed look at how to obtain, install, and configure the MySQL database server on your Windows PC.
MySQL Already Installed?
Before you start installing a brand new instance of MySQL, you should first determine whether or not you already have an earlier version of it installed, and if so, what to do about the older installation and any databases created using it. First, look in all of the directories where you have installed applications in the past. For Windows, "C:\Program Files" is the default installation directory. It is possible to have multiple versions of MySQL installed, usually in different directories whose names contain the version numbers.
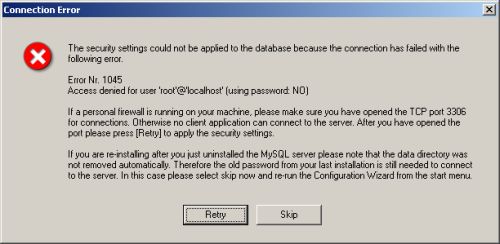
If you find an old version of MySQL installed on your PC, you have some options. Installing the latest version of MySQL over the older one has the advantage that you do not need to re-create any of those existing databases, as long as the formats of the database files are unchanged between versions. But it has the disadvantage of being a "dirty" install, which might not go as smoothly as a clean install into a new directory. For example, it can cause the MySQL Setup Wizard to see your old password (in the "mysql" database), making it impossible to apply the security settings, because you cannot login as root, even using the old password. More on this error, number 1045, later in the tutorial.
Clean installs may involve more work, but they are usually recommended. An additional benefit is that you can be sure that any problems discovered are not the result of leftover files from the old version.
Regardless of which option you choose, you should back up any databases that you want to save. The "data" subdirectory contains subdirectories for all the databases in the instance; but ignore "mysql" and "test", which are created and used by MySQL. To back up each database, use the mysqldump utility or a similar program, to export it in SQL format, so you can easily import it into the new instance. You may wish to copy the databases to a separate partition, or even hard drive, to be extra safe. Even though databases are rarely lost during installations, there is no point in running the risk.
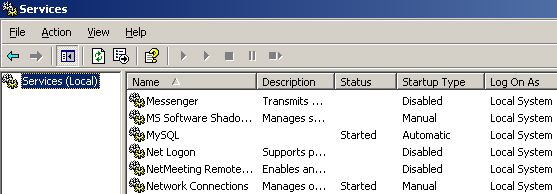
MySQL runs in the background, as a Windows service. So next check what Windows services are installed and running on your system. Go to Start > Settings > Control Panel > Administrative Tools > Services, then click the Standard tab.
The third entry in the illustration above shows that MySQL is currently running, with the status of "Started". You do not need to manually stop the service before uninstalling MySQL, because the uninstallation process handles that automatically.
In this tutorial, we will assume that only a single instance of MySQL was previously installed. To uninstall it, go to Start > Settings > Control Panel > Add or Remove Programs. Click on the MySQL entry in the list, and then click the "Remove" button.
Downloading MySQL
The first step in installing MySQL is to obtain the installation file from the MySQL downloads page. For this tutorial, we will be using the most recent stable version, which is 5.0.51a, as of this writing.
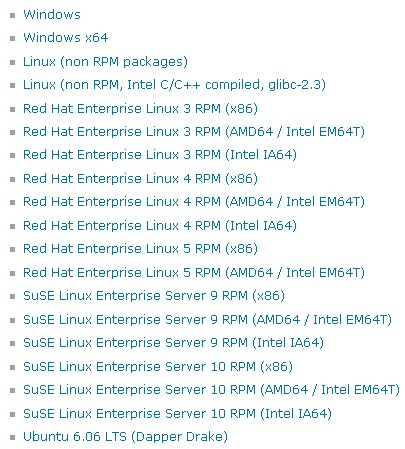
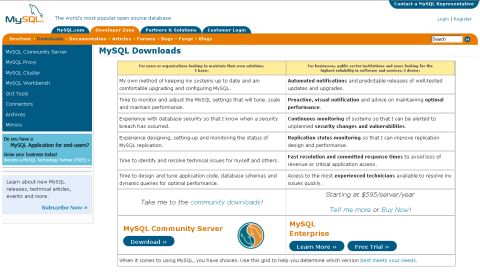
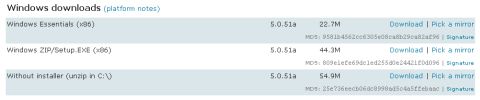
The page compares the differences between the two editions of MySQL — the free Community edition, and the Enterprise edition, which has a license fee of $595 per year. Any reader of this tutorial will most likely have the technical expertise to work with this database system without paying for help. Click on the "Download" button for the Community Server. This brings you further down the page, to the list of supported platforms (i.e., operating systems that it will run on), which include 32-bit and 64-bit Windows, several different Linux distros, Solaris, FreeBSD, Mac OS X, and a few others. (Not all are shown in the figure below.)
Immediately underneath that list is the section for "Windows downloads", providing three options: the MSI package, the ZIP package, and the installer-free package. Most readers should choose the first option, "Windows Essentials (x86)", which uses the Windows MSI Installer. If your PC's Windows does not have the MSI Installer, then you can choose the second option, "Windows ZIP/Setup.EXE (x86)". Each row in the section lists the MD5 signature, and has a link to the PGP signature, if you are interested in verifying the integrity of the installation file after you have downloaded it.
Click the appropriate "Download" link. The MySQL Web site might request your personal contact information, but that is optional. A dialog box will allow you to choose a destination for the installation file on your PC.
Installing MySQL
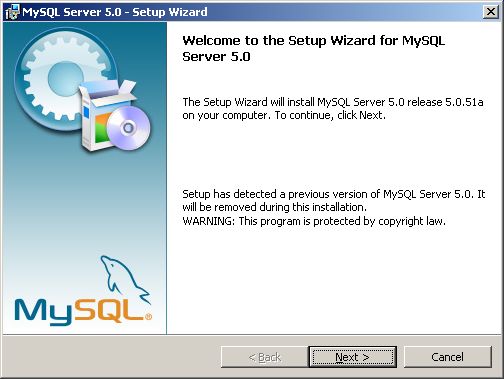
After the installation file has finished downloading, double-click it, which begins the MySQL Setup Wizard.
At the welcome dialog box, click the "Next" button.
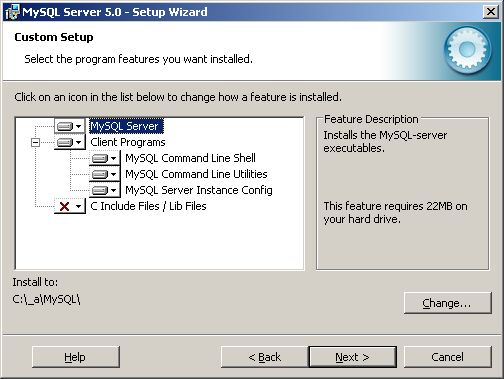
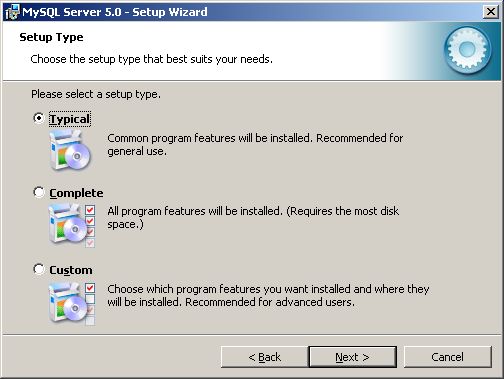
The MySQL Setup Wizard allows you to choose the installation directory on your computer, and whether or not to have optional components installed. In the "Setup Type" dialog box, you can choose from three setup types: Typical, Complete, and Custom. Choose the first one if you would like MySQL to be installed in the default directory, "C:\Program Files\MySQL\MySQL Server 5.0", and you also want all three client programs to be included (Command-Line Shell, Command Line Utilities, and Server Instance Config), but none of the C language 'include' or library files. For most users, this setup type should work fine. Choose a "Complete" setup to get all of the above, which probably would only be of interest to C programmers who want to examine MySQL's source code.
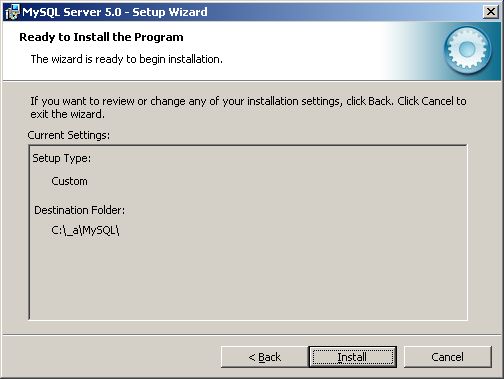
In this tutorial, we won't be using the default directory, and so we choose the "Custom" option, and specify an alternate installation directory, "C:\_a\MySQL". Some developers elect to install all of their applications in the default Windows directory, "C:\Program Files". But using a different directory has the advantage that it immediately distinguishes user-installed programs from those already installed by Windows or forcibly installed by any inconsiderate application that fails to allow one to specify its installation directory. The top-level directory name "_a" is short, saving space in the PATH environment variable, and its underscore pushes it to the top of any directory listing sorted alphabetically by filename, thus making it more visible.
After you have made all of your choices, click the "Next" button.
You are now ready to install MySQL's files. Click the "Install" button.
You may see some MySQL Enterprise advertisement dialog boxes.
Click through any ad boxes.
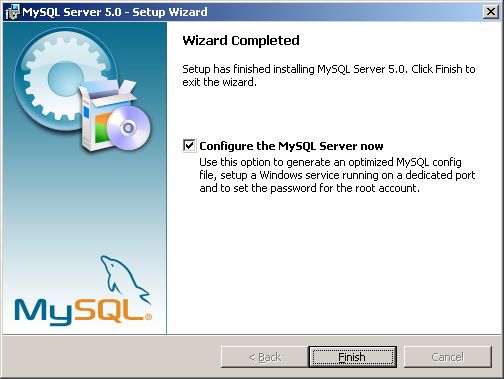
After the Setup Wizard has completed, you can and should configure your new server. Click the "Finish" button.
Configuring MySQL
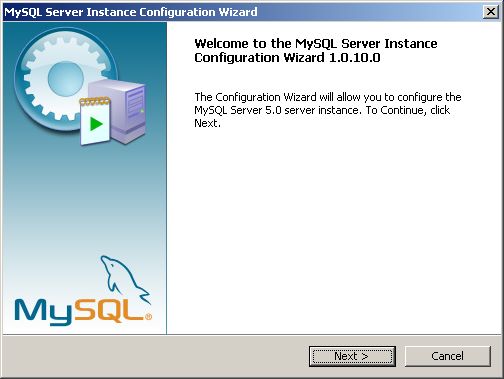
At the initial Server Instance Configuration Wizard dialog box, click the "Next" button.
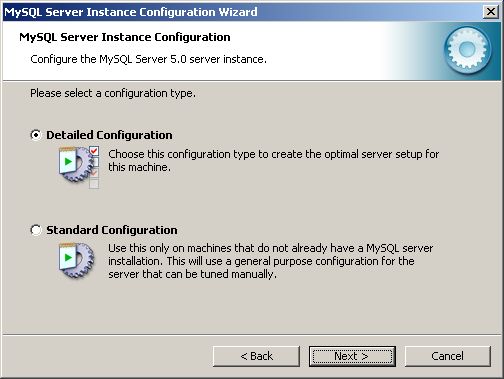
The configuration wizard allows you to choose either a detailed configuration, which gives you more control, or a standard configuration. Most developers, and this tutorial, will use the former option, which is also the default. Click the "Next" button.
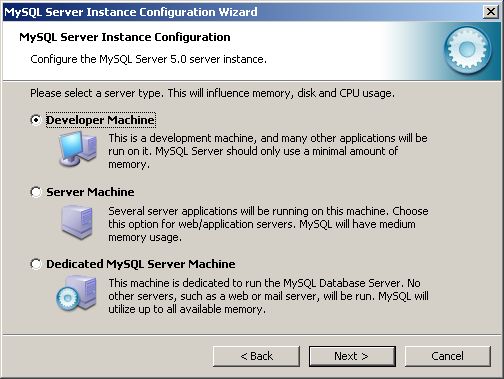
At this point, you must indicate how MySQL is going to be used on your PC — simply for development purposes, or as one of several server applications, or as an exclusively MySQL database server. For our purposes, choose the first option, which is the default. Click the "Next" button.
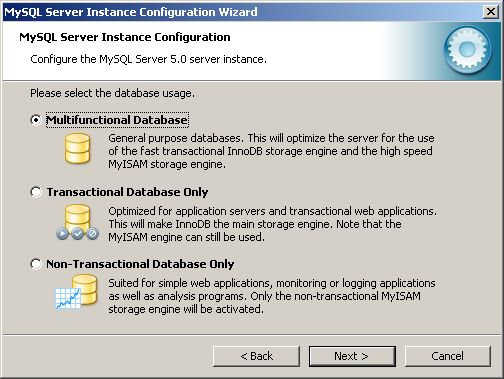
MySQL has two different built-in database storage engines: InnoDB and MyISAM. Only the former offers transaction functionality, but does so at a cost of somewhat reduced performance. At this point in the installation process, you should decide whether you will need — or simply want to try out — transactional operations for any of the database applications that you will be using with this particular MySQL instance. If you are sure that you will not be needing transactions, then you can choose the third option, "Non-Transactional Database Only", which is what we will be using in this tutorial. Otherwise, if your applications will be making heavy use of transactions, then choose the second option, "Transactional Database Only". This choice does not, however, preclude you from using the MyISAM engine. If you are not sure as to your need for transactions, or you see them as a limited portion of all anticipated transactions, then choose the first option, "Multifunctional Database", which is the default. Note that use of the InnoDB engine does require a considerable amount of disk space for the tablespace.
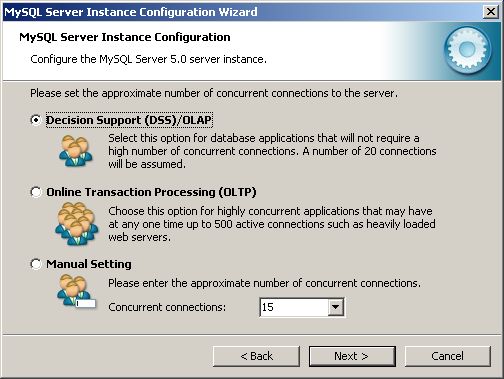
If your database is going to be hit by a large number of applications running concurrently, then it will need to allow a proportionally larger number of active connections. In that case, choose the second option in the dialog box shown above, "Online Transaction Processing (OLTP)". But this probably will not be the case for your development PC, and so you can leave the default option, "Decision Support (DSS)/OLAP", and then click the "Next" button.
For MySQL's networking, it is recommended to go with the defaults, namely, to enable TCP/IP networking, using port number 3306. The option to enable strict mode is not adequately explained in the dialog box. You should make a choice based upon whether or not there is a chance you will be using your database with applications, such as a proprietary shopping cart, whose code you cannot modify — specifically, any SQL queries. If that is the case, then do not enable strict mode, because it could result in an error if and when the application tries to set a non-nullable column to a default value by specifying an empty value of a different type, and you get an error 1366. Click the "Next" button.
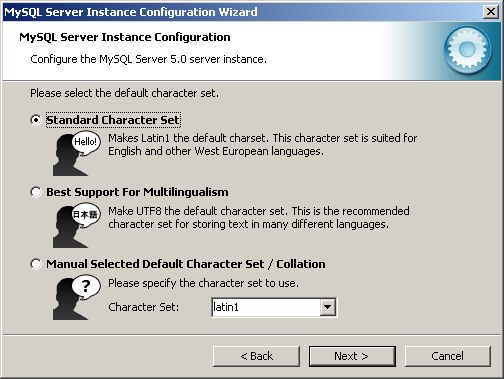
Choose the standard character set, which is the default option.
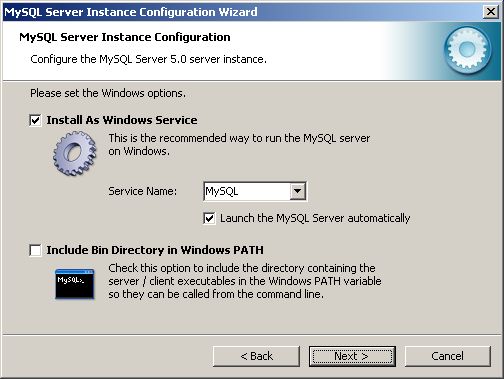
MySQL can be run by Windows as a service, and started automatically when you boot up your PC. Those are the default and recommended settings. MySQL's binary directory — in our case, "C:\_a\MySQL\bin" — contains more than a dozen executable programs. The Configuration Wizard can add the directory to your Path environment variable, so the programs can be run at the command line without specifying the directory. Click the checkbox to enable that, and then click the "Next" button.
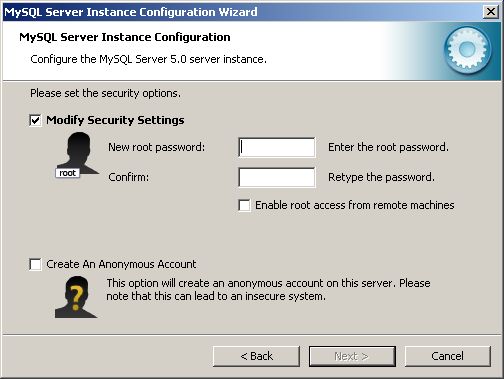
At the security options dialog box, enter a new root password, twice. Do not check the option to "Enable root access for remote machines", for security reasons. Do not bother creating an anonymous account, since you should do everything with named accounts. When you are satisfied with your chosen root password, record it somewhere safe, and then click the "Next" button.
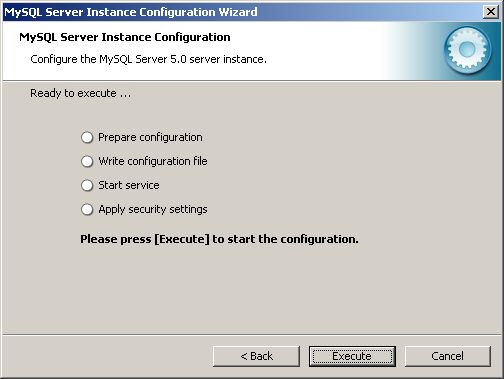
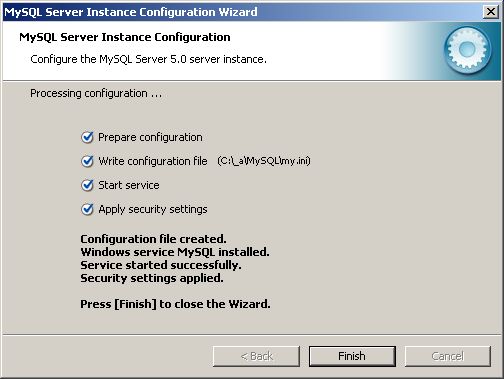
The Configuration Wizard is now ready to execute all of the settings that you have made in the earlier dialog boxes. Click the "Execute" button.
If you tried to install MySQL in a directory that still contained the "data" subdirectory, then the security settings will fail, and you will get an Error 1045.
But if the configuration does not encounter any errors, then you will be informed that the configuration file was created, the MySQL service was installed and started, and your security settings have been applied.
Verifying MySQL
Now that you have successfully installed your new MySQL server, you should test it to verify that at least the basic operations work fine. At a command-line prompt, go to the MySQL binary directory (in our example "C:\_a\MySQL\bin"), and run the MySQL monitor program, mysql.exe:
cd \_a\MySQL\bin
mysql --password --user=root
You should be prompted for the password that you had specified during the configuration process. After you enter that, you should see a welcome banner and a command prompt, "mysql>".
Welcome to the MySQL monitor. Commands end with ; or \g.
Your MySQL connection id is 4
Server version: 5.0.51a-community-nt MySQL Community Edition (GPL)
Type 'help;' or '\h' for help. Type '\c' to clear the buffer.
mysql>
You could then go into the MySQL database and list the tables. In fact, exploring the structure of these tables can give you insight into how MySQL works.
At this point, you have successfully installed and configured your MySQL database server, and can begin creating databases and everything that can be stored in them.
More Resources
If you need further information on MySQL, there are many resources available. There are countless Web sites and books dedicated to MySQL. But for the majority of veteran developers, their primary source of information is the online MySQL Reference Manual. It currently comprises 25 chapters and seven appendices, covering everything from installation, server administration, performance optimization, data types, functions, operators, and features introduced in version 5.0, such as store procedures and triggers.
There may be other free and open source RDBMSs out there, but if you are the typical Web developer, MySQL should be able to meet all of your online data store needs.